Debugging in ThreeJs: Getting started with 3D UI Tweaking Techniques

In my previous article "How to use WebGL for Interactive 3D Graphics" we explored a way to interact with objects inside a 3D canvas. You may have also noticed at the end of the article the demo in code sandbox where you can try it out, there were some slider bars on the top-right side of the screen. Those are tools for debugging in real time the objects that we are interacting with within the canvas.
Introduction
A crucial aspect of any creative project is to ensure that debugging and code tweaking is simple and easy. It is necessary to enable the developer, designers, and clients to modify as many parameters as possible to obtain the best results.
This could include:
- Positions of objects,
- Colors like background,
and many more, which could lead to unexpected and/or great outcomes.
To achieve this, a debug user interface (UI) is required. There are many libraries available but we are going to use the most popular one: dat.GUI.
dat.GUI is a popular library for creating debug UIs in JavaScript applications. It allows you to create a graphical user interface for modifying various parameters in your code, making it easier to debug and fine-tune your project.
Unfortunately dat.GUI has not been maintained for a long time and even Three.js switched to another version of dat.GUI is called lil-gui. Also, lil-gui has better mobile support.
Getting started with lil-gui
To get started with lil-gui, you need to download and include it in your project. You can either download it directly from the official website or use a package manager like npm or yarn. Once you've included it in your project, you can start using it to create a debug UI.
npm install --save lil-gui
After we have installed it in the project we have to include it in the file we are creating the objects. Reminding you that we are taking as an example the project from the previous blog.
1. Importing GUI in our ".js" file:
// ---- Rest of imports from THREE ---- //
import * as dat from 'lil-gui'

// Instantiate
const gui = new dat.GUI();
If you noticed we are using * as dat just for the sake of keeping the same text naming structure, because of the old library dat.GUI. Although have to mention that lil-gui is built on top of dat.GUI
Okay back to business.
Now to create a debug UI, you need to define a configuration object that specifies the parameters you want to modify. Here's an example:
const params = {
  color: '#ff0000',
};

gui.addColor(params, 'color');
We define a configuration object called params with three parameter color but you can add more to it. We then call gui property we created earlier and use the addColor() method to add the parameter color to the debug UI.
The addColor() method creates a color picker for the color parameter, allowing you to choose a color using the GUI.
2. Debugging objects created with Three.js
Now that we've created a debug UI using dat.GUI, let's explore how to use it to debug ThreeJs objects. Let's take the scene of the example project and try to edit its background color. We would want to do something like this:
// Scene
const scene = new THREE.Scene();
scene.background = new THREE.Color( params.color );
scene.fog = new THREE.Fog( params.color, 1, 20 );

gui.addColor(params, 'color').name('BgColor').onChange(function(value) {

    scene.background.set( value );
    scene.fog.set( value );

});
If you noticed we are using params.color that we created earlier and applying it in scene.background property. Then we apply it also in gui.addColor() along with a name that appears on the UI to identify what this input does.
This code creates a new control in a lil-gui instance that allows the user to select a color value for a Three.js scene's background and fog.
.onChange(function(value) { ... }) specifies a function that should be called whenever the control's value changes. In this case, the function sets the background and fog properties of the ThreeJS scene object to the new color value.
So when the user selects a new color value for the "BgColor" control in the gui interface, the onChange function is called, which sets the background and fog properties of the Three.js scene object to the selected color value.
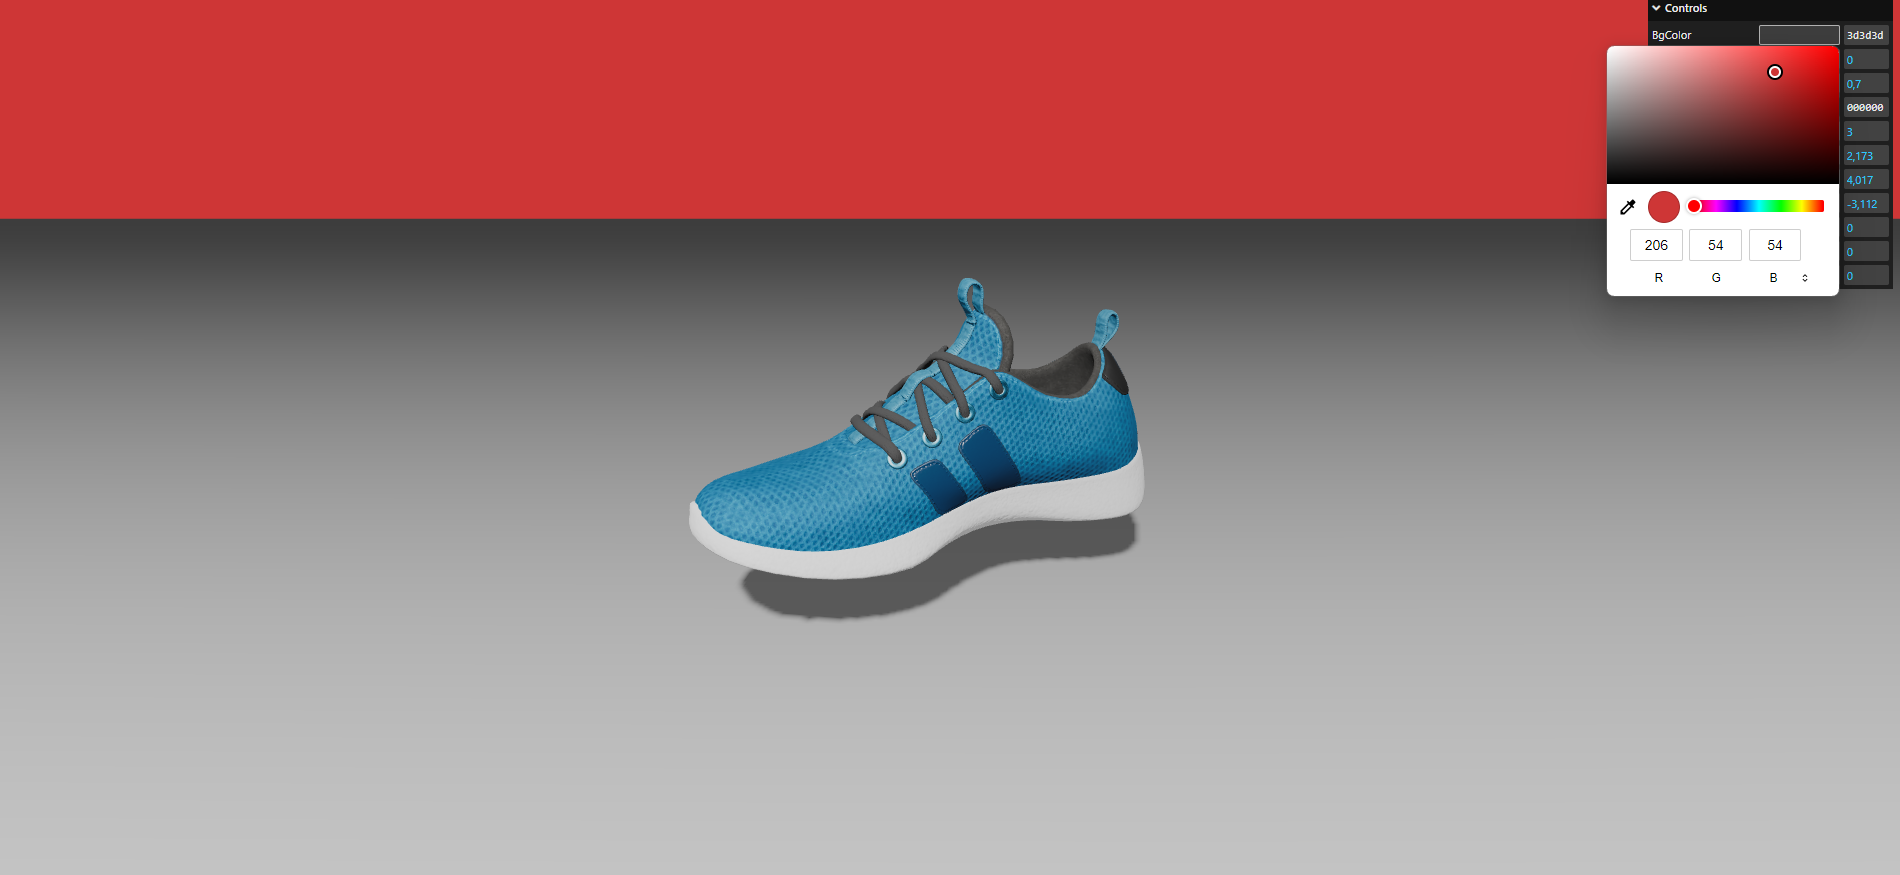
We set the color of the background to a red-ish color but you can choose your preference. We will switch back to the color it was before just so that it matches the fog color. In this case, the fog and background color will blend in one and it will look like one big endless field.
Next, we can update the position of the model. Say that we want to see the shoe on top of the plane geometry. Without debugging directly in UI we would go to the code and add the values, update the file and reopen the browser. That would be annoying and time-consuming. Instead, we update the position with gui.add().
Positioning Object in the 3D view
gui.add(mesh.position, 'x').min(-5).max(5).step(0.001).name('MeshPositionX');
Let's say we have the mesh already created, which is the shoe object, and now we want to get its position. We add as the first parameter in gui.add() the mesh.position and we select on the second parameter the X value, telling the operator that we want to move the object on the X-Axis.
Here's a breakdown of what the other parameters in the code do:
.min(-5)sets the minimum value that the control can take to -5..max(5)sets the maximum value that the control can take to 5..step(0.001)sets the increment at which the control value will change. In this case, the value will change in increments of 0.001..name('MeshPositionX')sets the display name of the control to "MeshPositionX".
So when the user modifies the "MeshPositionX" control in the lil-gui interface, the X position of the mesh.position property will be updated accordingly.
Based on this, now we add the other positions as well, Y, Z:
// ---- Previous Code that loads the mesh using "gltfLoader.load()" ---- //
gui.add(mesh.position,'x').min(-5).max(5).step(0.001).name('MeshPositionX');
gui.add(mesh.position, 'y').min(-5).max(5).step(0.001).name('MeshPositionY');
gui.add(mesh.position, 'z').min(-5).max(5).step(0.001).name('MeshPositionZ');
Like this, we have added the Three Axes of the object mesh loaded.
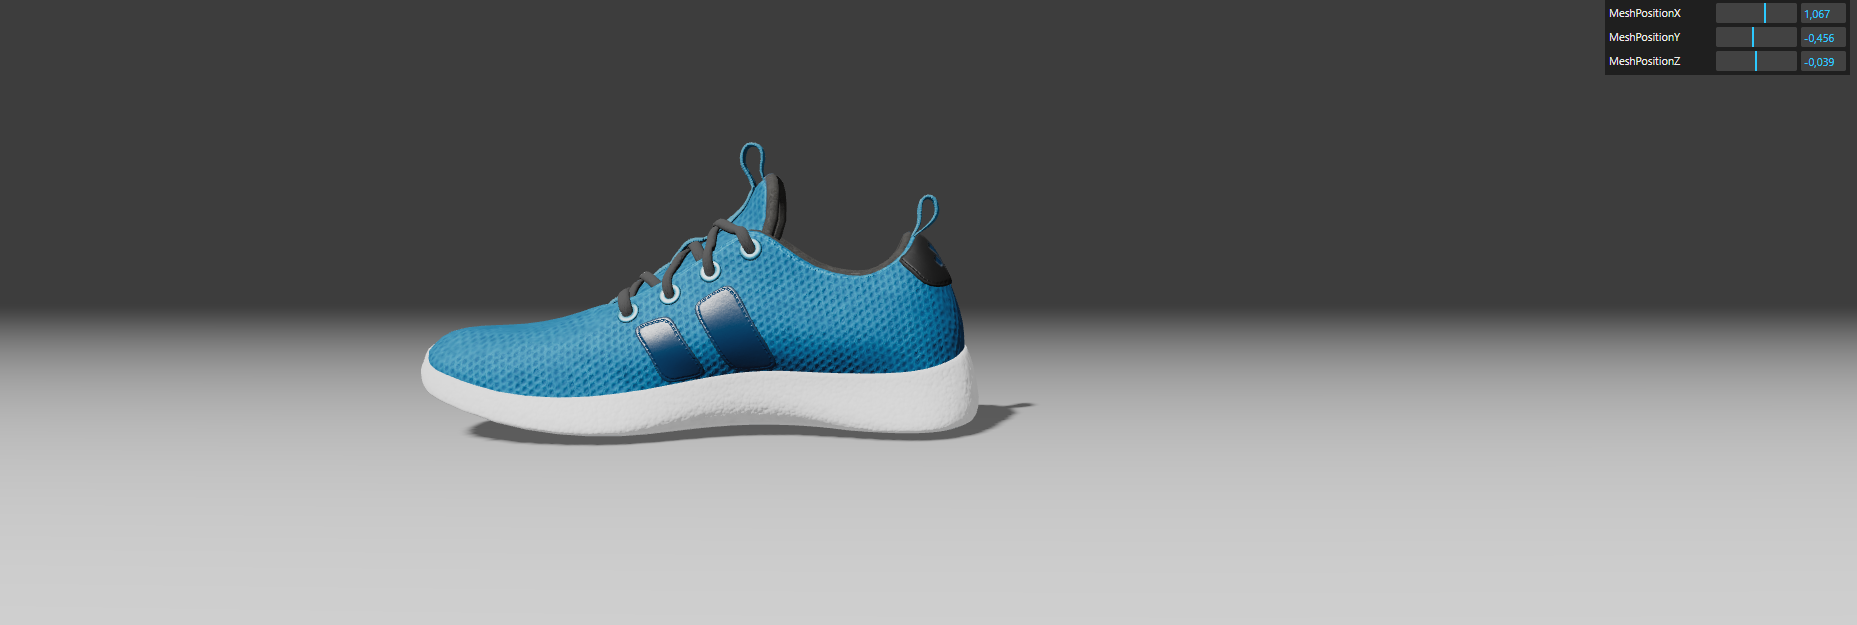
As you can see from the picture we have slightly moved the object to the -X and Z position and in the Y-Axis we moved the object down so it seems like it's touching the plane geometry.
The same thing we did for positioning the object with mesh.position we can for many other objects that contain position as property, such as lights.
Debugging with Lights and Helpers from Three.Js
Just like before we can add to the light the position inside gui.add() and declare the x, y, z axis so that we can see how light interferes with our object.
Let's say we created a Directional Light. To do that insert this code after a specific light is created:
// Directional light
const directionalLight = new THREE.DirectionalLight(0xffffff, 3,854 );
directionalLight.position.set(2.173, 4.017, -3.112);
directionalLight.castShadow = true;
scene.add(directionalLight);

//Helpers
gui.add(directionalLight,'intensity').min(0).max(10).step(0.001).name('lightIntensity');
gui.add(directionalLight.position,'x').min(-5).max(5).step(0.001).name('lightX');
gui.add(directionalLight.position,'y').min(-5).max(5).step(0.001).name('lightY');
gui.add(directionalLight.position,'z').min(-5).max(5).step(0.001).name('lightZ');
Using this we will get in the gui UI the values of each axis of the directional light along with the intensity value. I added intensity just so we can see better using more light when needed. To test the light better I have also added castShadow property of the directionalLight which is a boolean value that shows if you want this object to cast its shadow or not.
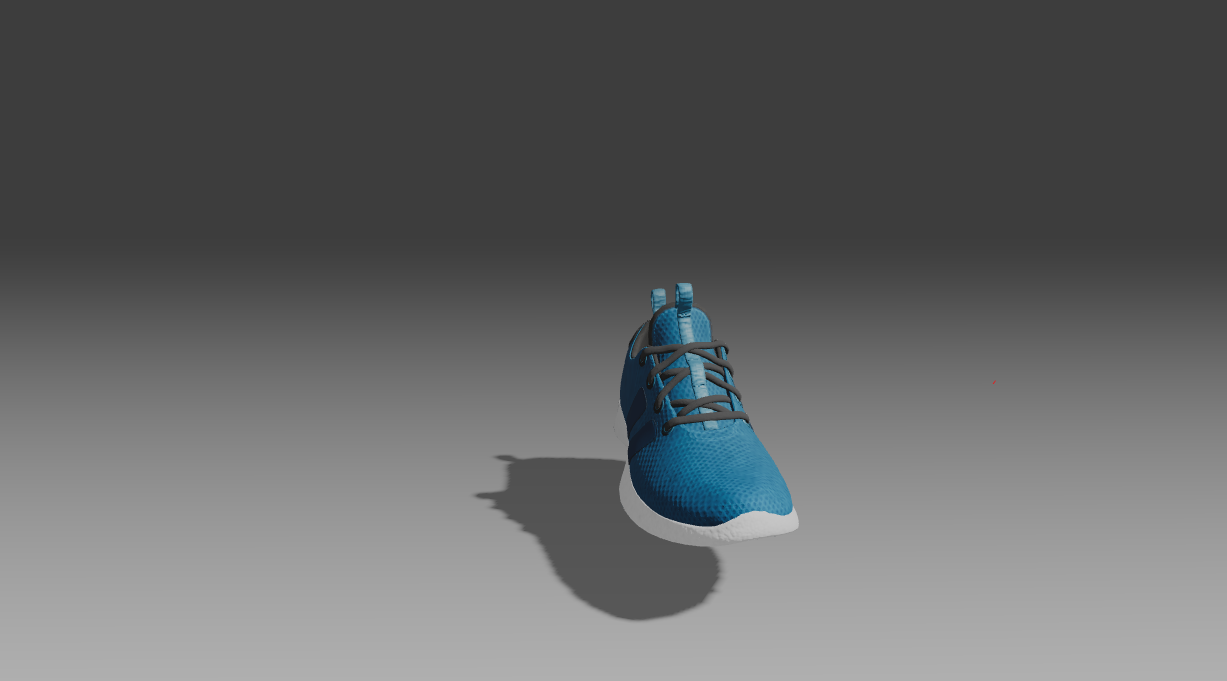
With this, we get a better understanding of where to set the position of the light in order so our object can be displayed based on our preferences
Note: Be advised that for a
meshto show properly in the 3D scene it needslightjust like objects in real life.
Now you may wonder, we positioned the light but what if we could visualize the light objects so we can have a better view of where it is coming from? To do that we add Helpers.
Helpers in Three.Js
In Three.Js, helpers are objects that can be added to a scene to assist in the visualization and debugging of a 3D scene. These helpers are not part of the actual scene and do not affect the rendering process, but they can be used to visualize the dimensions and properties of other objects in the scene.
There are several types of helpers available in Three, including:
AxisHelper
GridHelper
BoxHelper
CameraHelper
DirectionalLightHelper
SpotLightHelper
HemisphereLightHelper
PointLightHelper
Each of these helpers creates a representation of its position, direction and many more based on the type of the helper.
They can be added to a scene just like any other object, and their properties can be customized to suit your needs. They are especially useful for debugging and fine-tuning a scene's lighting, camera, and object placement. Additionally, you can create your custom helpers by extending the Object3D class and implementing your visualizations.
To have an example we will add to the scene a DirectionalLightHelper Class since we are already playing around with the light. To do that we have to call the class after creating directionalLight property:
// Directional light
const directionalLight = new THREE.DirectionalLight(0xffffff, 3,854 )
directionalLight.position.set(2.173, 4.017, -3.112)
directionalLight.castShadow = true;
scene.add(directionalLight)

const directionalLightHelper = new THREE.DirectionalLightHelper(directionalLight);
scene.add(directionalLightHelper);

// ---- Rest of the code ---- //
Now we can see where directionalLightHelper is coming from shown in the 3D Scene as a white box with a line pointing at the model:

Now if we change the values of lightX, lightY or lightZ from gui UI we will also see the object DirectionalLightHelper move along with the light.
Following this logic, we can do this with any other object helper we call from Three.js.
Feel free to play around also in three.js documentation as they have more examples than me and more advanced and detailed documentation.
You can find its documentation here: https://threejs.org/
Documentation is the most important!!!
With that said, you have now learned how to debug in Three.JS using all the tools available. By utilizing the tools and techniques discussed in this article, you can ensure that your projects are optimized for performance, free of bugs and glitches, and offer the best possible user experience.
Remember that debugging is an iterative process, and you may need to tweak and adjust your code and settings multiple times before achieving the desired result. By using the tools covered in this article, however, you should be able to make the process smoother and more efficient.
Whether you are working on a small hobby project or a large-scale commercial application, taking the time to properly debug your code is crucial for success.
So go forth, experiment, and happy debugging!
As always I will leave here an updated version of the codesandbox project playground.
Stay Awesome and thank you for reading! See you at the next one 🫡


