
How to use WebGL for Interactive 3D Graphics
Have you ever wondered if you could interact with 3D models inside your computer screen?


Well of course you have, If you’ve ever played a modern video game on a console or computer, then you’re already familiar with the concept.
I am not talking about the old school games like Super Mario or Donkey Kong which were made in a 2D canvas. I mean the 3D video games where you have access to different models inside the 3D canvas in which you can interact with the terrain.
They are made using game engines that utilize mathematics and physics to create an immersive 3D environment that the player can interact with. Typically, low-level programming languages like C++ are used to create them. In the gaming industry, most of the big companies use their game engines that are built on the foundation of C++.
Now here’s the thing…
Imagine being able to bring this level of interactivity to the web development world. For example, you are visiting an e-commerce website that sells shoes. Instead of just looking at pictures of the shoes, you could interact with a full 3D model of the shoe in more detail.
It is more than possible to achieve this using something called WebGL.
At the end of the article you will have a real-time 3D rendering of WebGL so you can try how it feels.
What is WebGL?
WebGL is a
JavaScriptAPI for rendering interactive3D graphicsin modern web browsers without the need for plugins.
As a developer who is always pushing the boundaries of what’s possible with technology, lately using a lot of 3D visual design in web/desktop applications, I am thrilled to dive into the world of WebGL.
One tool that has greatly influenced and enhanced my work in this field is Three.js.
Three.js is a JavaScript library that allows you to create and display 3D graphics in the browser using WebGL.
It is fast (very fast I might say),
Lightweight
Easy to use, making it possible for web developers to create complex 3D graphics in their projects.
Three.js is also well-suited to game development thanks to its support for WebGL, which allows you to create fast and smooth 3D graphics that can run in the browser. Of course, you won’t build a remastered version of Grand Theft Auto, but it helps you understand how the mechanics work.
Creating 3D Graphics with WebGL and Three.js
One of the things I love about Three.js is how easy it is to get started with.
Let's take as an example the shoe e-commerce website I mentioned above and create a 3D model of a shoe to show how it will look on the website.
Here’s how you would start:
1. Find a 3D model
You can either create your own 3D model using 3D modelling software or find a pre-made model online.
For this example, I will be using an existing one from Three.js.
2. Create a Canvas & Renderer
We need a canvas to create the 3D environment and a renderer to animate/show the 3D space.
//... HTML Part
<canvas class="webgl"></canvas>

//... JavaScript
const canvas = document.querySelector('canvas.webgl');

/**
 * Renderer
 */
const renderer = new THREE.WebGLRenderer({
    canvas: canvas,
    antialias: true
})
// Size of the renderer window
renderer.setSize(window.innerWidth, window.innerHeight);
// Pixel ratio is set to render the scene properly in all devices
renderer.setPixelRatio(Math.min(window.devicePixelRatio, 2));
3. Create a scene
In Three.js, you start by creating a scene, which is like a container. You place your objects, models in it, and you ask Three.js to render that scene.
const scene = new THREE.Scene();
4. Add a Camera to the scene
There are two(2) types of cameras: Perspective Camera and an Orthographic Camera.
- Perspective Camera: Is designed to mimic the way the human eye sees.
The perspective camera is the most common projection mode used for rendering a 3D scene so will use this one.
/**
 * Camera
 */
const camera = new THREE.PerspectiveCamera( 45, window.innerWidth / window.innerHeight, 0.25, 20 );
scene.add(camera)
After creating successfully the scene and the camera we need to render it in the window. Usually, this step is done in the end, but I want to show you the loaded model in the images below.
const animate = () =>
{
    // Render
    renderer.render(scene, camera)

    // Call tick again on the next frame
    window.requestAnimationFrame(animate)
}

animate();
5. Load a 3D model
We will use GLTFLoader to open a .gltf file, and add its path. Most 3D models come in .gltf format, but there are others like .stl, .glb, .obj, etc.
const loader = new THREE.GLTFLoader();

loader.load(
  'shoePath', (gltfFile) => {
  scene.add(gltfFile.scene);
});
At this point we will have something like this:
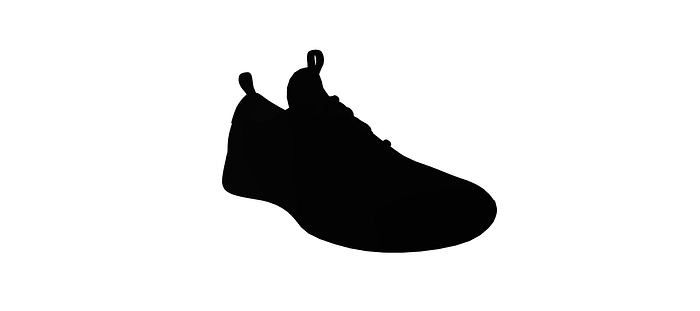
You may notice, of course, just a white background with a colourless (what seems to be) shoe in it. That happens because we don’t have lightning in our scene. The material of the 3D model reacts to light, just as a planet does from the light of a star, and we need light to show it properly. Well makes sense. So to step 6:
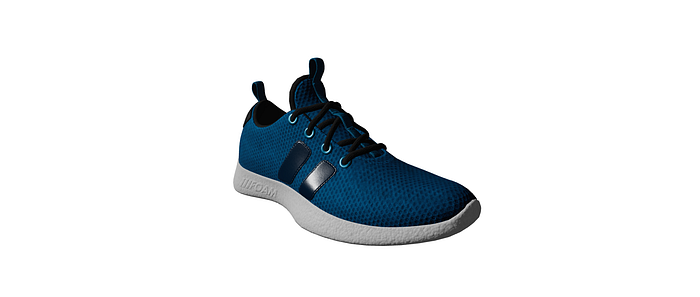
6. Add Light
There are six(6) kinds of lights in three.js but we are going to use just two of them for this example:
Ambient Light— This light globally illuminates all objects in the scene.Directional Light— A ‘sun-like’ light that gets emitted in a specific direction.
// First parameter is the color of light; second is intensity of light.
const ambientLight = new THREE.AmbientLight(0xffffff, 0.5);
const directionalLight = new THREE.DirectionalLight(0xffffff, 0.5);
// Finally we add Light to the Scene
scene.add(ambientLight, directionalLight);
And now the updated canvas:
Now what we need is a ground to properly reflect the light that comes from above, hits the shoe, and the ground at the same time while also displaying the shadow of the model.
To do that we have to create a mesh composed by Plane Geometry.
A
meshin 3D graphics is an object composed of vertices, edges, and faces that define the shape of an object in 3D space, and it is composed of ageometryandmaterialproperties.
7. Add Plane Geometry.
const planeMaterial = new THREE.MeshStandardMaterial( { color: params.material, specular: 0x101010 } );
const planeGeometry = new THREE.PlaneGeometry(50, 50);
const planeMesh = new THREE.Mesh(planeGeometry, material);

planeMesh.rotation.x = - Math.PI / 2;
planeMesh.position.y = - 0.5;
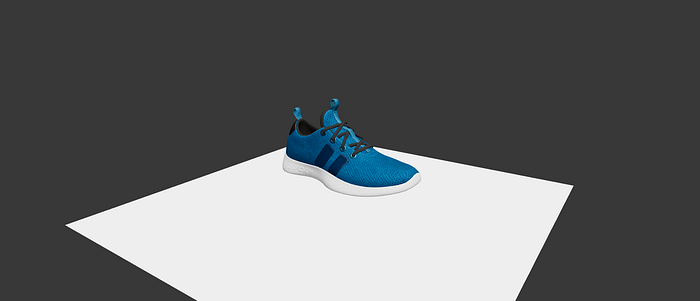
By default, plane geometry is created vertically at the centre of the screen. So we need to add some math for rotations, hence Math.PI / 2, in the x-axis causes it to spin 90 degrees in a clockwise direction when viewed from the top as seen in the picture.
8. Next, the shadow.
To project the shadow of the model in the plane, we insert these new lines for the 3D Model, Plane Geometry and also the renderer:
// ...
loader.load(
  'shoePath', (gltfFile) => {

  // create a constant "mesh" to make it reusable
  const mesh = gltfFile.scene;
  mesh.castShadow = true;
  //... rest of the code

});

// ... at plane creation
planeMesh.receiveShadow = true;

//... at renderer
renderer.shadowMap.enabled = true;
renderer.shadowMap.type = THREE.PCFSoftShadowMap;
After some modifications of the background, scene fog, and the plane geometry to style it better in the end we will see this:

And that’s it! With just a few lines of code, you can display a 3D shoe on a web page and allow users to interact with it.
There is so much more to explore in WebGL and the possibilities for 3D graphics in web development are endless.
While I cannot cover everything in this article, I will continue to share my experiences and insights on this topic in future, more advanced, articles.
In the meantime, feel free to play around with the code I have provided in CodeSandBox & StackBlitz and see what you can create. I have also added some helpers for you to control lightning and also use controls to move around the object at every angle.
https://stackblitz.com/edit/node-cgmgef?embed=1&file=src/script.js
Stay tuned for more updates, and you can reach out if you have any specific topics or questions you’d like me to cover. I’m always happy to help and share my experience with WebGL, Three.js, and more!
If you liked this article don’t hesitate to follow and leave a like!
See you at the next one.